I am always afraid of dropping my computer when carrying it. Being a sewist I would never think of buying a padded case for it because–why would I when I can make one?
Periodically I will put it in a different tote bag and carry it that way. It’s not ideal, as often times the tote isn’t padded like it should be. I spent a lot of money on my MacBook Pro, so it should be protected.
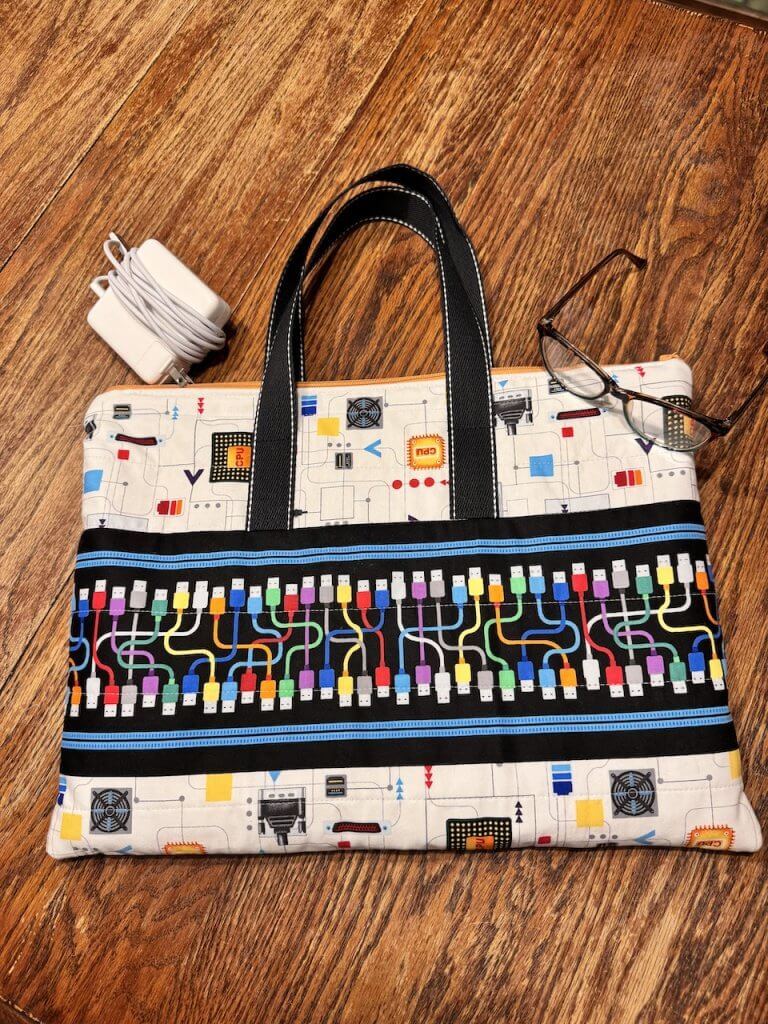
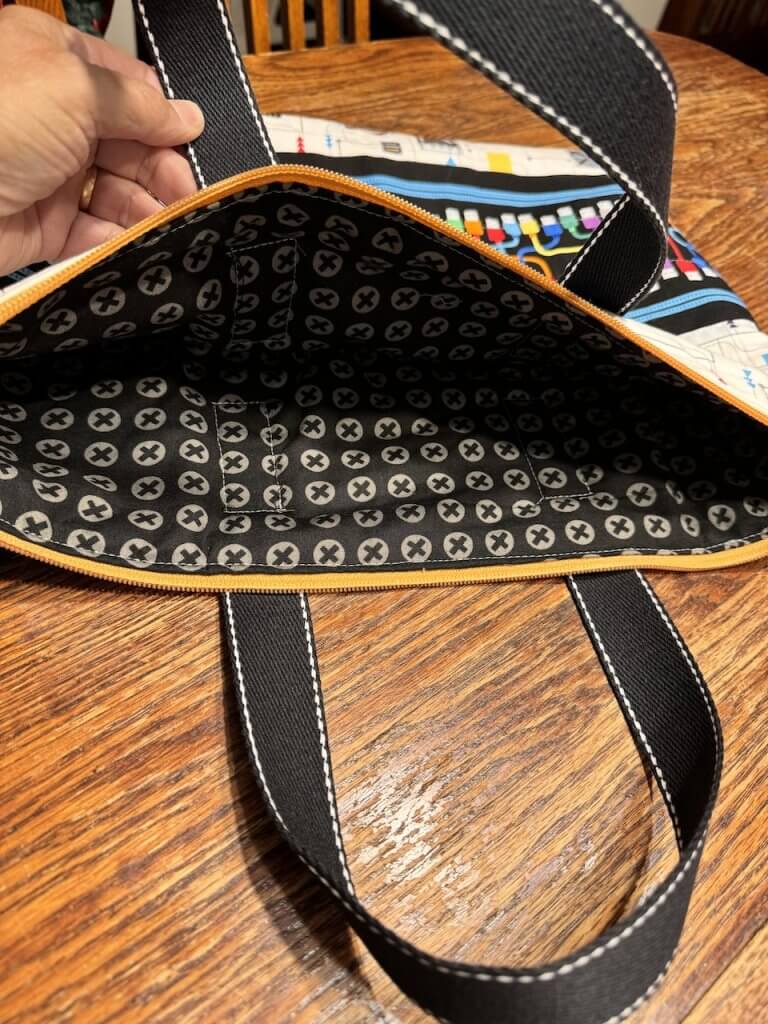
The fabric used for the outer main fabric was designed by me for Studio e Fabrics. It’s called Data Point, and it is the striped fabric. The inner lining is from Moda Fabrics.
Here’s how to make a padded computer case with handles and a zipper!
Materials:
1/2 yard outer, main fabric
1/2 yard lining fabric
1 zipper the length of your computer plus 3 to 4 inches
1 yard webbing for handles
quilt batting 1/2 yard x 44 inches
1 yard woven fusible interfacing 44 inches wide
Tools:
Walking foot for sewing machine
Rotary Cutter, Rotary Ruler and Mat
Zipper Foot
Iron
Quilting safety pins
Prepare the Fabric
- Measure your computer. First you must measure the length and width of your computer. Some computers are thicker than others, so you have to take that into account as well. A MacBook Air is considerably thinner than a Pro. If it’s a thin computer, add 1 inch to the measurements as opposed to 2.
- Cut the Main Fabric to the size of the computer length and width, adding 2 inches to the length and 2 inches to the width.
- Repeat step 2 for the lining and the batting.
- Repeat step 2 for the woven fusible interfacing, cut 4.
Make the Layers
- Lay the main fabric wrong side up. Lay the quilt batting on the wrong side of the main fabric.
- Lay the fusible side of the woven fusible interfacing against the batting.

3. Making certain that the edges of all 3 layers are well approximated, iron the layers together.
4. Pin all layers securely together with safety pins, thereby basting the layers together.
5. Quilt the layers in any design you like.
6. Repeat for the remaining main fabric, batting and woven fusible interfacing.
Reinforce the Lining
- Fuse the remaining 2 pieces of fusible woven interfacing to the wrong sides of the 2 lining rectangles.
Make the Zipper Sandwich
- Place the quilted main fabric right side up.
- Place the zipper wrong side against the main fabric as shown, making certain to allow the tab end and the zipper end to hang freely from the ends.

3. Place one of the lining rectangles right sides together with the unit above, and align the edges of
lining with the edges of the zipper and quilted piece.

4. Stitch through all layers: the interfaced lining, the zipper tape, and the quilted main fabric using
the walking foot.
5. Make certain not to hit the zipper teeth with your needle.

6. Open out the lining and the main fabric.
7. Pull the zipper outward and away from the fabric. Press to remove any lips or folds of fabric.

8. Place the second lining rectangle right side up, and lay the unsewn zipper tape on top of it,
aligning the edge of the zipper with the edge of the rectangle.

9. Place the remaining quilted main fabric right sides together with the unit from step 8, aligning
the long edge with the right side of the zipper tape.
10. Pin through all layers–the quilted main fabric, the zipper tape and the lining.

11. Stitch through all layers using the zipper foot or the walking foot, whichever one works the best.
12. Open out the main fabric and the lining, and press along edge of zipper so that there are no lips
or folds of fabric.

Stitch the Bag Together
- Unzip the zipper about 1/3 of the way.
- Bring the quilted main fabrics upward and right sides together.

3. Keep the lining free of the upper main fabric.
4. Make sure the edges of the quilted main fabric and the lining fabrics are well approximated.
5. Stitch along all edges of the the unit with a 1/2 inch seam allowance, leaving a 3 inch opening at the bottom of the lining, and across the zipper. Fold the zipper upward toward the main fabric.
6. Clip corners to remove bulk.
7. Clip off the ends of the zipper that are extending.
8. Turn the entire unit right sides out.
9. Push the lining down into the main bag. Stitch the opening in the bottom of the lining closed.
Stitch Along Zipper
- Pull the fabrics away from the zipper and press.
- Stitch 1/4 inch along the sides of the zipper using a zipper foot to keep the fabric from getting caught in the zipper.
Add Handles
- Cut the webbing for the handles to your desired length. Make certain that they are a comfortable length for you to carry.
- Center the handles on one side and stitch to the bag.
- Center the handles to the opposite side and stitch to the bag.