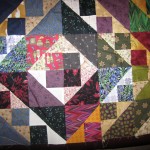
With this quilt, you start with a center square and just work your way out.
I want to explain how this quilt is done. It’s so simple I feel like I could just say to someone “just start with a square and keep on bordering it until it’s the right size”. However, that wouldn’t be very nice of me, and even though it’s true, there are some things that are real tricky about bordering and bordering as you go. Things can get pretty wonky, pretty quickly.
You will need to buy enough fabric for the entire length of the borders, unless you are okay with piecing the borders. For example, if a border strip is 72 inches long, you will need to buy a 2 yards because you may not wish to piece it. You will cut the border parallel to the selvedge, along the length of the fabric as opposed to the width. Just make sure to buy enough fabric!
So let’s start talking about how someone may approach this quilt. First of all, in your head, you need to have an idea of how large you want this to turn out. I initially thought that I was just going to do a throw size, but it very quickly enlarged to become queen size. I know exactly how this happened.
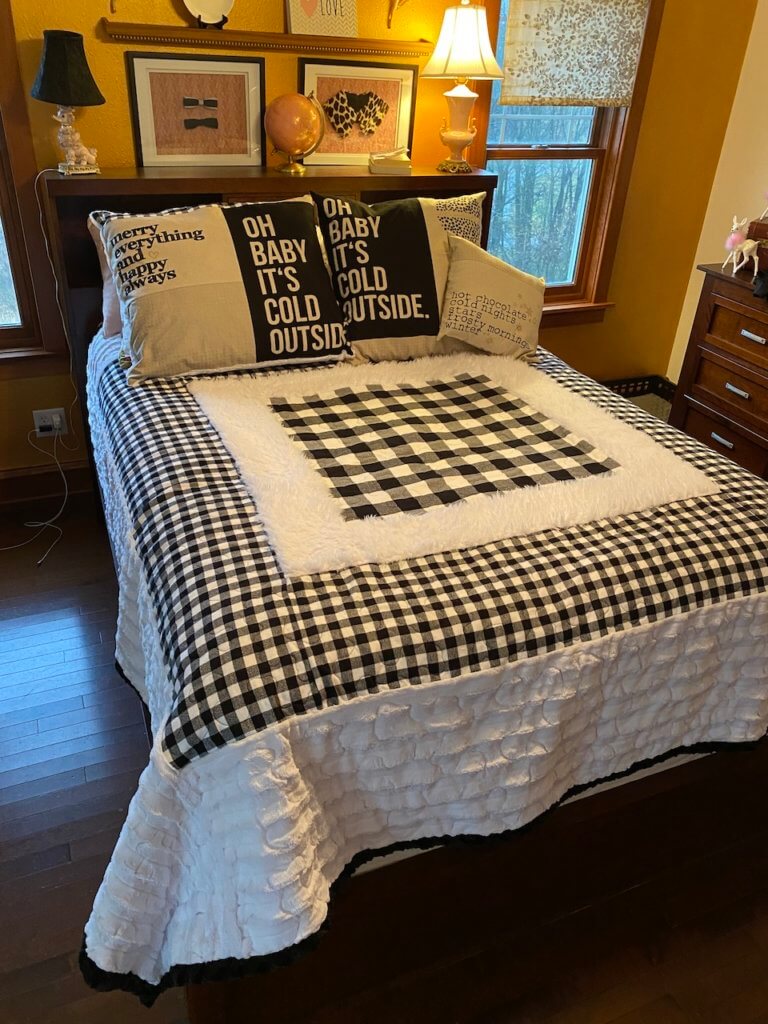
When I was cutting the center square, I cut it out at a much larger size than I should have. It started out at 31” x 31” because I needed to cut this fabric along the edges of the buffalo checks. I really should have made it half that size if I was only going to do a throw. But, it ended up bed size, and that’s fine with me.
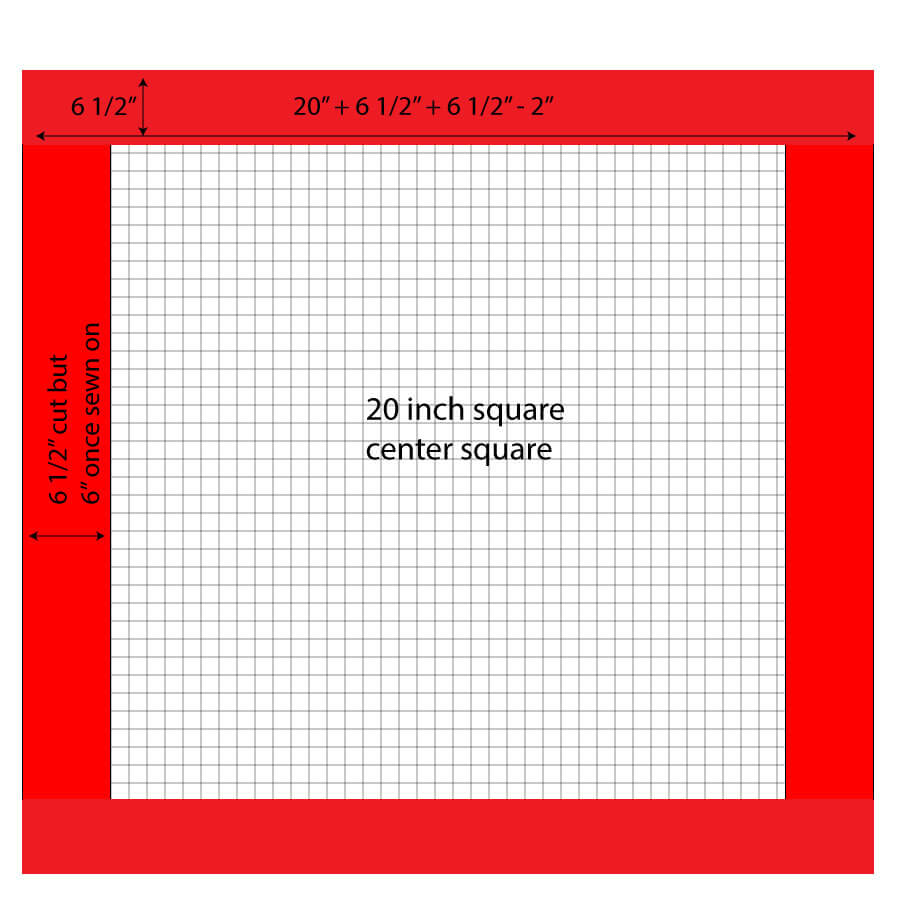
So, let’s say that your center square is 20” x 20”. Now you have to decide what you’re going to border it with. I wanted to combine textures and border it with Cuddle. I used the Cuddle Llama in white. Obviously, two sides of the border, the ones opposite of each other are going to be cut 20” in length. The strip width is 6 1/2”. I cut 2 rectangles that were 20” x 6 1/2”. Determine the length of the next two sides by adding as follows:
20” + 6 1/2” + 6 1/2” – 2”
Why are we subtracting 2”? Because the seam allowances for Cuddle are 1/2”. You are taking up 1/2 inch on two sides of the checkered fabric, and 1/2 inch from each of the Cuddle strips.

So, if your fabric center is 20”, and your two borders started out at 6 1/2”, you need to cut the borders for the top and bottom to be rectangles that are 6 1/2” x 31”. Then, pin those borders in place using lots of pins because you must make the existing unit (the center square and left and right borders) fit that top and bottom border. You should never measure along the edge and then cut the border. The reason is that the edge can stretch, and you will have a wonky, wavy edge resulting in a wavy wonky quilt.
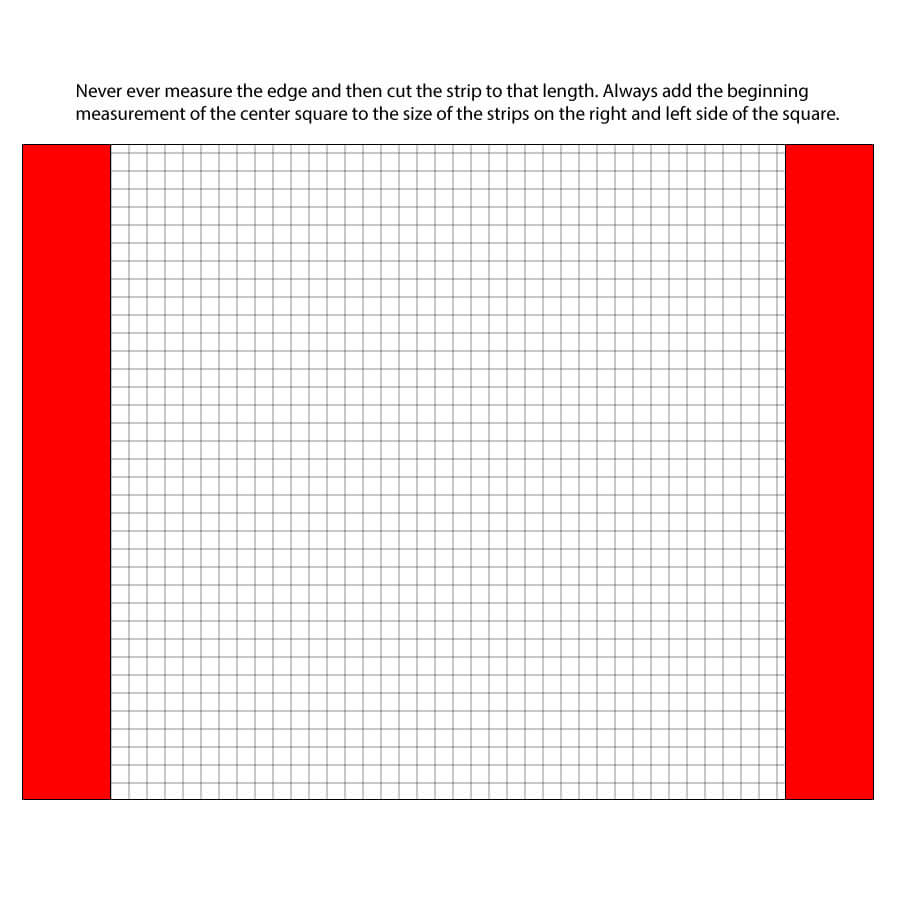
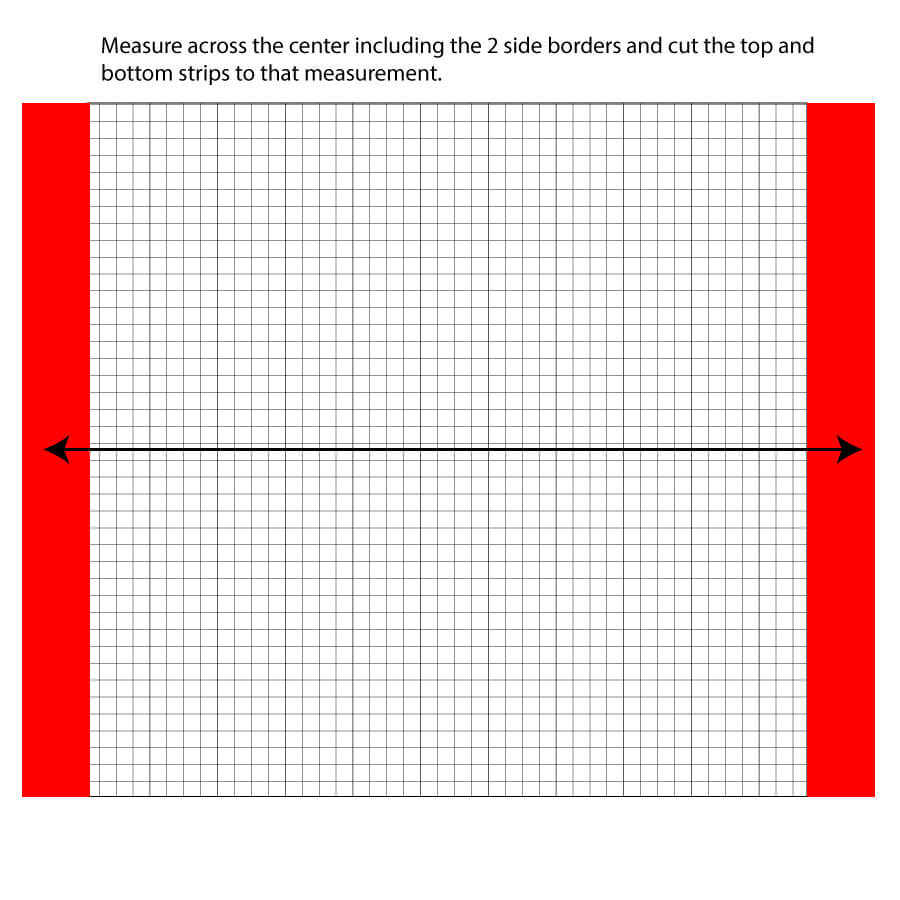
The other option is to measure across the center of the piece with the side borders already sewn on. Then cut the borders for the top and bottom to that measurement. Sew them to the top and bottom, making the unit fit the borders. If you need to ease one or the other, that is fine, but the border measurements must equal the center measurement.
Next, after your center block is bordered out on 4 sides you will begin that process all over. You will then decide which fabric goes next on the sides of the bordered block. Perhaps, like in the quilt that I did, you will make a really wide second border. You will continue to measure in the ways that I have explained above. If you do this, then you will not have any trouble with a quilt that is “out of square”. Believe me, that can happen easily. Always, always measure twice, three or four times, and cut once.
After you have as many borders as you would like, and the quilt is the size you want it to be, then you can decide on a backing fabric. Layer, and quilt as desired, but I have something to discuss in regard to binding.
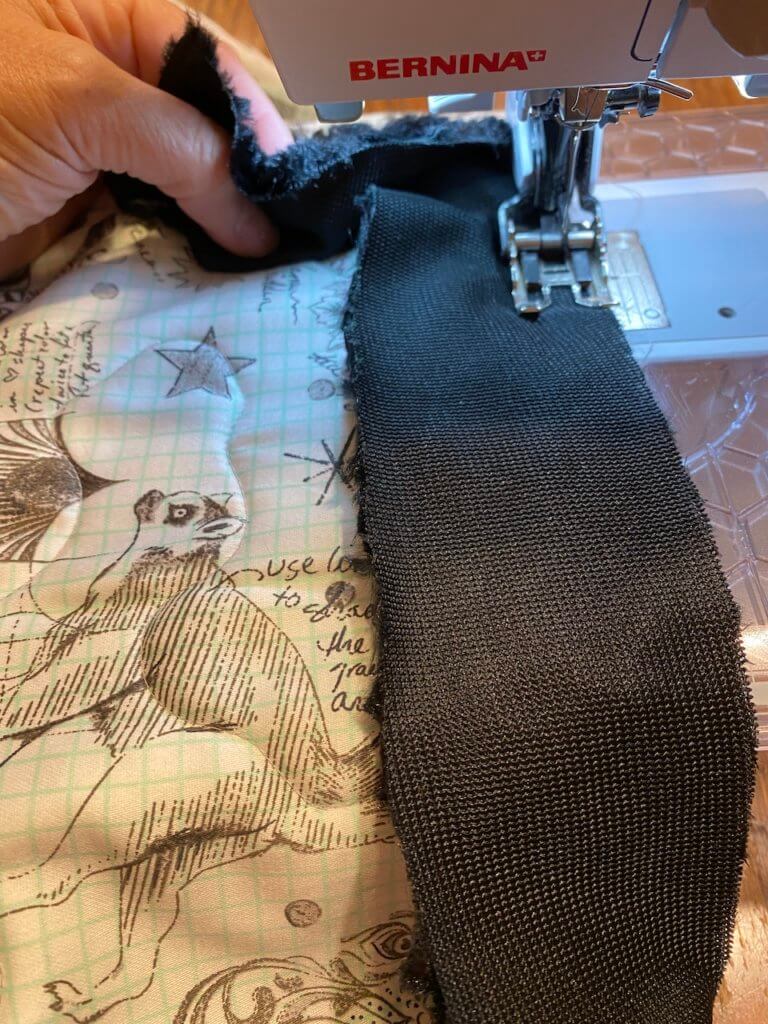
For this quilt, I decided to do a Cuddle binding. It just fit well with the theme. The beauty of Cuddle binding is that there is no hand stitching.
I cut this binding 2 inches wide. Since Cuddle is 60 inches wide from selvedge to selvedge, you get a really nice long 2” strip from this. I then all of my binding strips together to make one long strip, just like with regular binding except that there is no need to sew them on an angle. You can just do a blunt sewing of end to end, right sides together, because with Cuddle you cannot see the seam.
Now you can lay the binding strips on the back of the quilt, right sides together.
Don’t forget to leave a tail–don’t start stitching right at the beginning of the strip. You need a 6-8 inch tail at the beginning. Stitch the binding all the way around as you would any binding, and miter the corners just as you would with any binding.
When you come around to the part where you started, stop a good 10 inches away from the starting point.
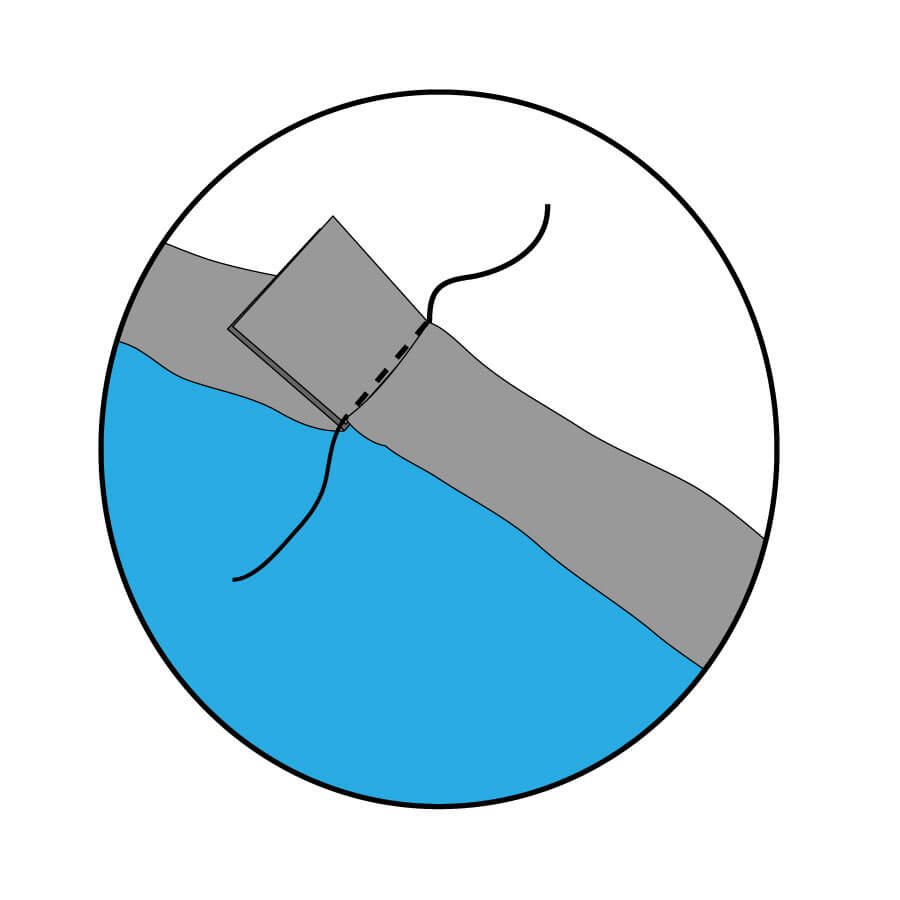
Next refer to the photo below. You will lay your binding out, bringing the beginning tail together with the ending tail. Fold the binding back onto itself, with the beginning tail and ending tail butted up against each other.
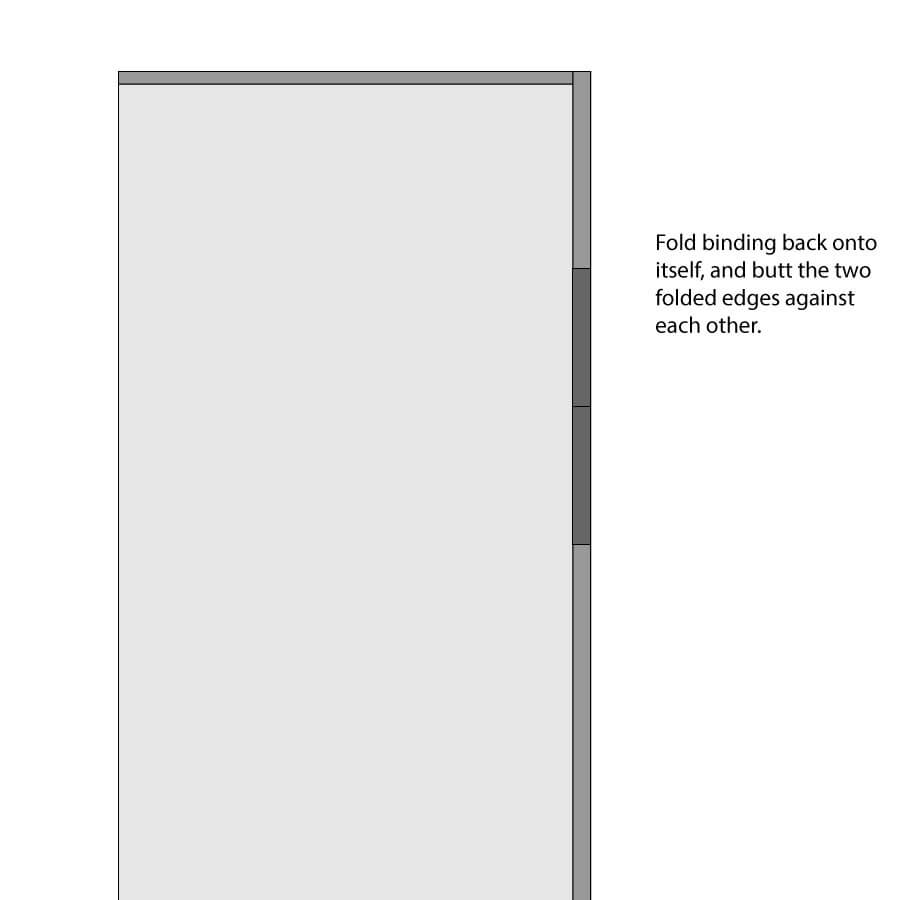
Trim the tails 1” away from the fold.
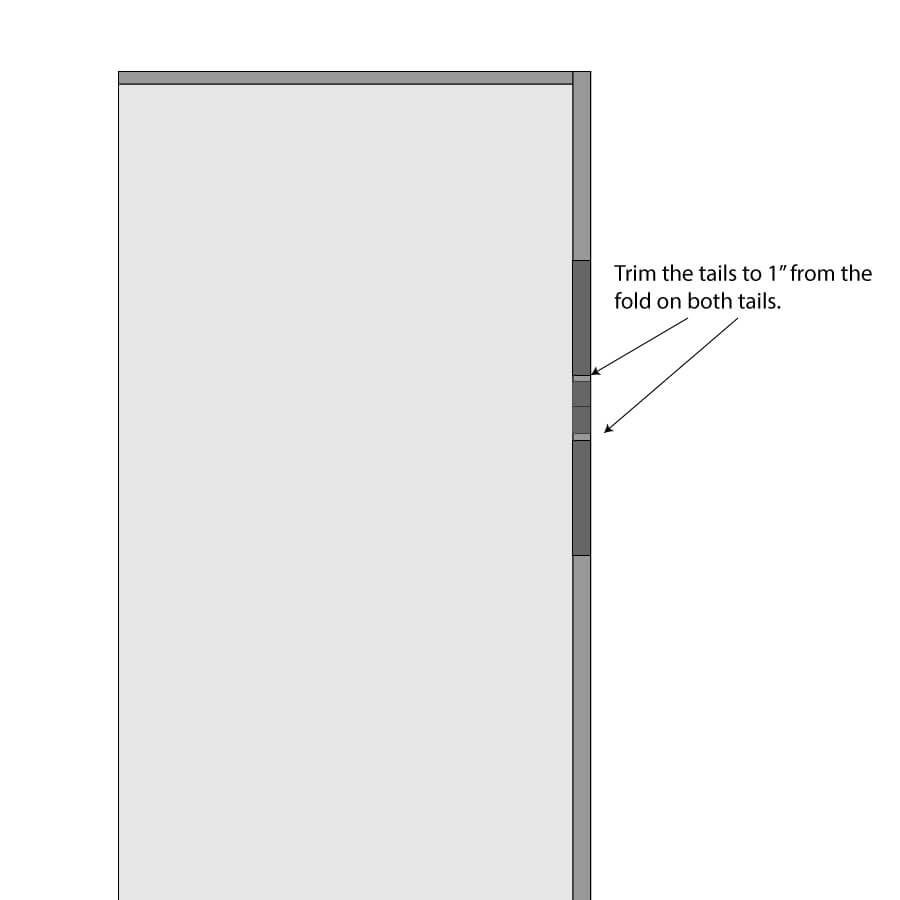
Where the fold lines are, you will stitch the binding together, so mark these folds with a pin or with chalk. Stitch them together, and then after they’re stitched, trim to 1/4 inch.
Now, stitch the section that was the tails that are now joined, on to the back of the quilt.
Now you can turn your entire binding outward and around to the right side of the quilt. You will use a serpentine stitch on your sewing machine to sew the binding down on the right side of the quilt.
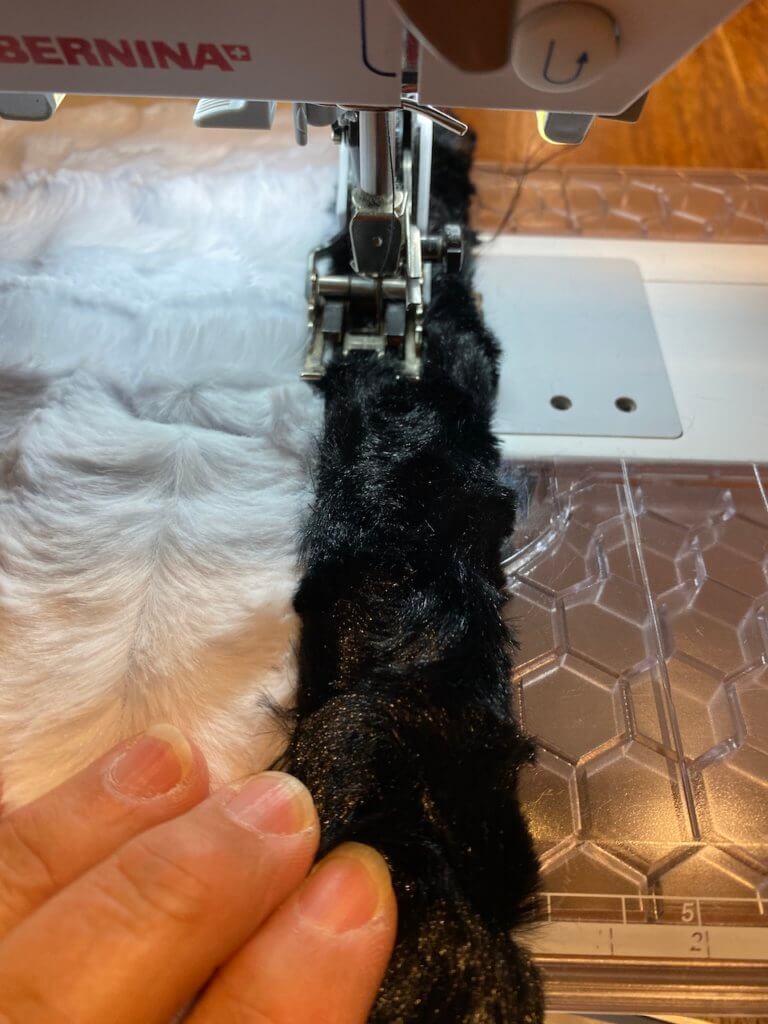
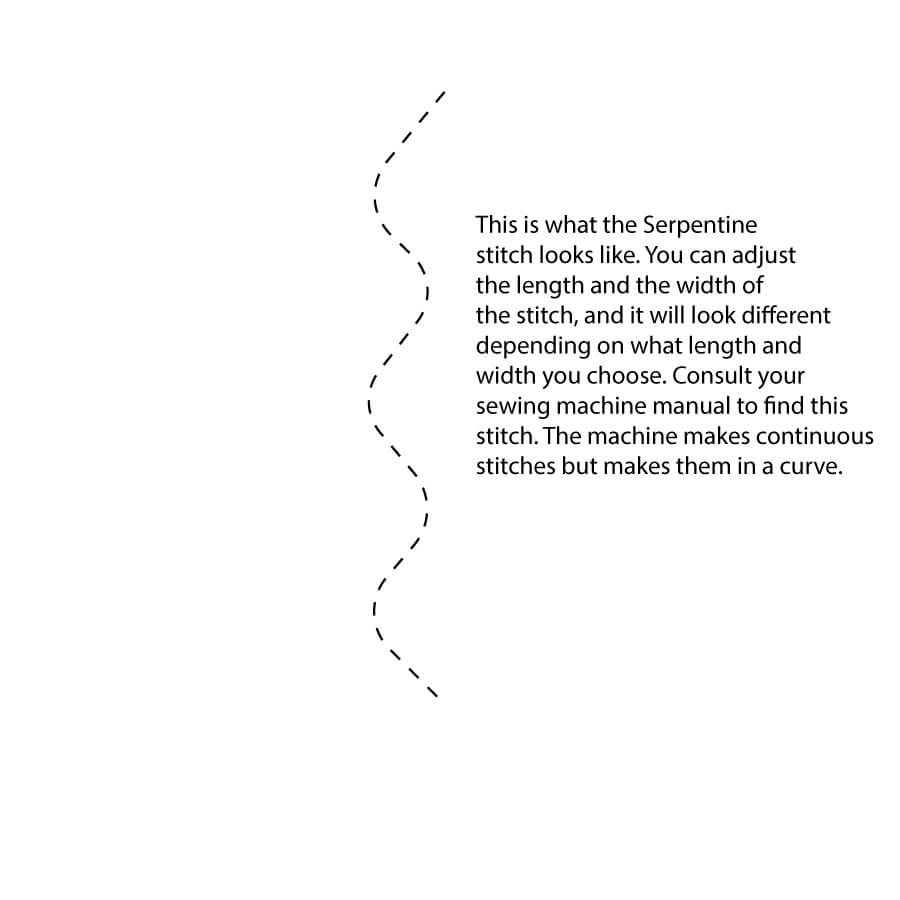
This is what the serpentine stitch looks like. It works great on bindings with minky. It catches all the edges and provides a beautiful finish. Use this to sew your binding down on the right side of the quilt.
Ta da! You’re finished. And depending on the size of your quilt, and depending on which fabric you choose, you will have something deliciously fabulous in no time at all.