I was always under the impression that hand applique was the gold standard amongst quilters. I still believe this is true. If you’re going to applique, then it should be done by hand. Wait–whoa! I don’t have a lifetime to make one quilt. There are some people that find this to be an activity of relaxation. I find it to be an activity of frustration.
While it is true that I don’t believe all quilts must be “fast and easy”, I do think that one should be able to finish it in a lifetime. I don’t know about anyone else, but I like to knit and sew garments too. So, I don’t have the time to applique or hand stitch an entire quilt. Even if it’s part of a quilt, I just don’t have time.
So, I needed to learn the best possible way to machine applique. There’s the satin stitch method. In this method a satin stitch is used on the machine. Decorative thread is zig-zagged around the motif. There are confusing rules about needle position and the swing position for the needle when rounding corners. You have to have all the right stabilizers. It’s not easy, but it’s faster than hand applique. It tends to be a little heavy looking in terms of the thread. There is a lot of thread used in this method.
Then there’s the method that I like the best. What I do is cut the shape that needs to be appliqued on, and cut the identical shape out of interfacing.
When I reinforce something or use interfacing I always, always use woven fusible. It’s kind of like muslin with a glue applied to one side. The big exception to this is machine applique. When I machine applique I use the lightest form of interfacing I can find, and sometimes, depending on the project, that can be tricot. Tricot is a very lightweight knit fabric that is a lot less stretchy than you think. It works well with other knits but is useful when you have a shape that you’re cutting that has more convoluted edges. If you’re concerned about the pull of an interfacing across different cuts and grains, tricot may be for you. It has other great uses, but that’s a topic for another day.
Since I tend to not applique complicated shapes, lightweight non-woven is usually just fine.
I would like to say a word about heat ‘n bond. I don’t like to use it for a lot of reasons, and I mean a lot. I don’t want glue on my quilt that will discolor it in years to come. I also don’t think that gluing a quilt together should be an option.
So, back to machine applique. My fav method is to interface the applique shape with non-woven fusible. The fusible has a very light amount of tiny glue dots. The glue dots, for this purpose, are considered the right side of the interfacing. My shape is cut from my fabric. My interfacing is cut the same shape. If it’s not a symmetric shape then the interfacing and the fabric are to be cut mirror image of each other with the glue dot side considered the right side of the interfacing. Then, I layer the fabric and the interfacing, right sides together, and I stitch them together around the perimeter.
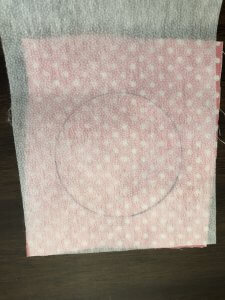
In this photo I have actually traced the shape onto the interfacing and laid it over a square of fabric. Then I just stitched the actual shape. This works really well.
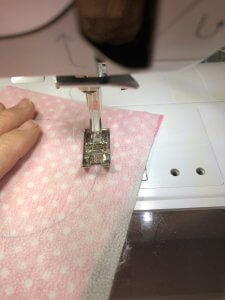
So if this were a dog, or a cat, or a heart, whatever, you would just draw the shape onto the interfacing and then lay it, right sides together with the fabric that will be used as the actual applique. Then, stitch right on the line. Then, you are going to cut about 1/8” away from that stitching.
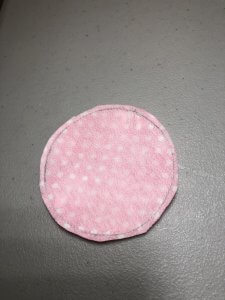
If you cut a true 1/8” you shouldn’t need to clip the curves.
Make a cut through the interfacing so that you can turn it right side out.
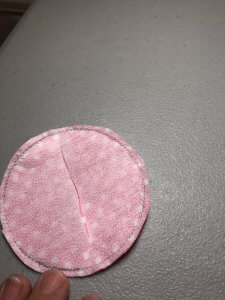
Turn it right side out and make sure that the entire curved edge is pushed out as far as possible. It helps to have a turning bodkin for this.
Then, place it over the fabric that you want to applique it to. You may want to reinforce the back of that piece of fabric with interfacing as well. If you don’t want to have the thickness of a stabilizer hanging around, you can use a water soluble one.
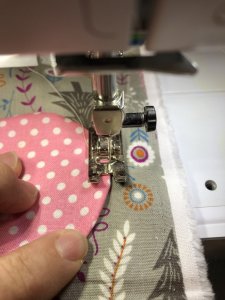
I then turn my sewing machine to the blind hem stitch. The blind hem stitch will make a little zig over to the applique, and then stitch along the very edge of the shape in between the little zigs. You must have the needle very, very very close to the applique so that the stitches just melt into the side of the applique piece. Then, every few stitches, it will zig over to the applique, anchoring it.
Don’t let the regular stitches come up onto the applique, only the zigs.
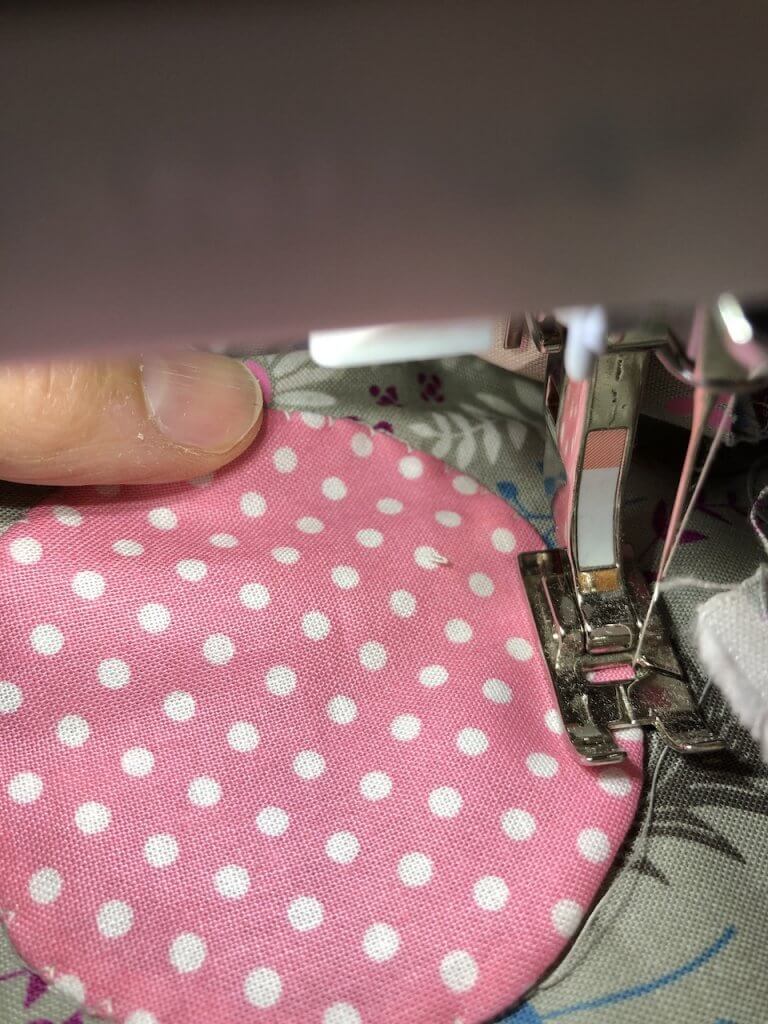
And, of course, use thread color to match. I used a light gray here instead of pink so that it would show up.
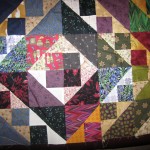
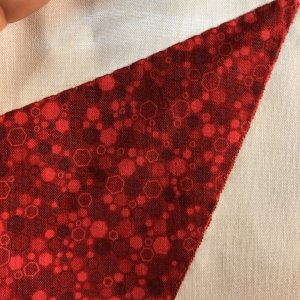
So, I am making a quilt using applique and this method. Here’s a piece of that block.
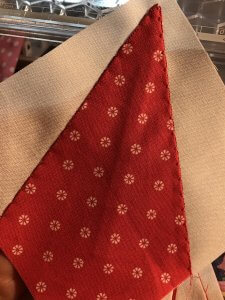
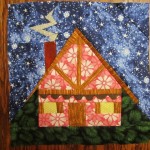
This piece is not interfaced on the back, rather, the fabric is folded in such a way that it is self facing. You can see that there are little zigs around the edge, but I must say that it looks rather tidy and neat.
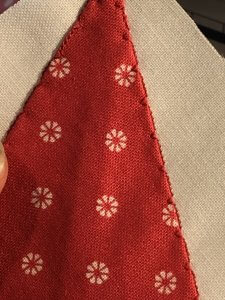
Here you can see up close that the stitches just lay next to the applique, and only the little zigs come up onto the fabric. These are adjustable. You can make them closer together, you can make them wider to look more or less obvious. However you want it to be is fine.
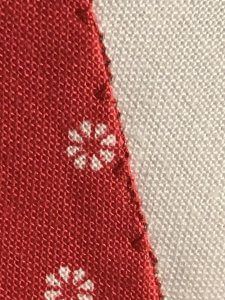
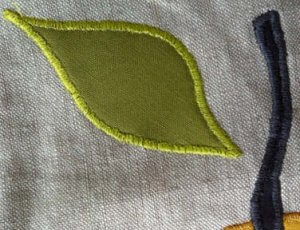
In this picture, the stitches actually came up onto the applique piece. When this happens, they should be ripped out.
This one turned out very well, and you can’t even see the stitches.
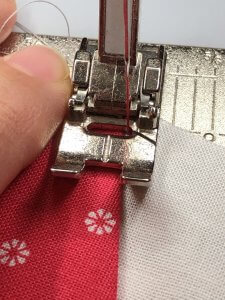
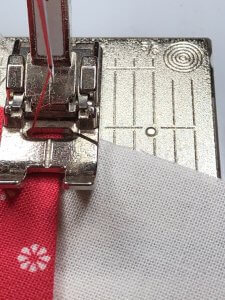
Here you can see that the needle is about to go down next to the edge of the applique. It should almost be a little closer. You shouldn’t be able to see the underlying fabric through the presser foot–that’s how close you need to have the stitches.
Do your best and practice a lot!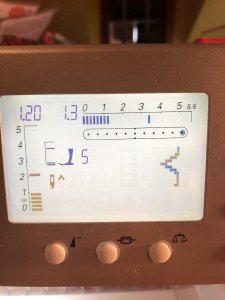
Here’s the setting that I use on my machine. The stitch length and width are very small.
It takes practice, but you will get it quickly!