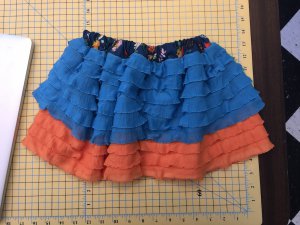
You’ve seen the ruffle fabric so many times on my website. I guess you could say I am in love with it and I am. I am in love with things where the fabric does all the work. So, ruffle fabric does just that. Plus, it’s so carefree. It travels well, washes up well and doesn’t wrinkle.
I decided to make yet another ruffle skirt for little girls. I had some pieces left over after I kitted up a quilt. So here it is.
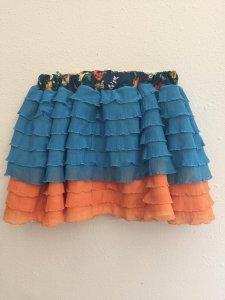
What you will need:
- 1 1/2 yards of 44” wide muslin
- Sewing Machine or serger
- 3 inches of 44” wide waistband fabric
- 1 yard 1” non roll elastic
- 1/2 yard 54” wide ruffle fabric for under skirt
- 1/4 yard 54” wide ruffle fabric for over skirt
I actually built this on top of a base of muslin. This gives it a little more body, and makes it a little easier to work with. Let me show you how.
You have to decide how long you are going to make the skirt. Measure the child from the waist to above the knee. The waist is not what most people think that it is. It is actually higher than most think. Here is where it really should be. It is above the umbilicus.

This is just a picture that I had lying around of myself. (Ha Ha. I will be dying of some rare disease before I ever look like this). Anyway, that is the real natural waistline.
Measure from here down to right above the knee. This is the length that you will call the skirt length.
Ruffle fabric is wider than most fabrics. It’s not a true 60 inches wide, but it’s right around 54 inches wide. The bottom tier, in this case the orange one, will be cut to the skirt length.
Let’s say that you want the skirt to measure 13 inches. The ruffle fabric is 54 inches wide. The ruffles are perpendicular to the selvedges of the fabric. In other words, they run selvedge to selvedge. So, you will cut your ruffle fabric to be 13 inches long. It will be 54 inches wide.
Muslin comes 44 inches wide. So, you will have to have a piece of muslin that is 54 inches long. You can either piece it or buy 54 inches of muslin which is 1 1/2 yards. Then, cut a 14 inch piece parallel to the selvedge. Don’t cut the selvedge off. You can use this at the bottom so that you don’t have to hem it. (I know all the shortcuts!)
Now you have a muslin piece that is 14 inches x 54 inches. You have a lower tier of ruffle that is 13 inches x 54 inches. Now you need your upper tier. Cut a shorter piece of ruffle that is 54 inches wide. Mine is blue. It is about 4 inches shorter than the orange, so we’ll call it 9 inches, or a 1/4 yard piece of ruffle fabric.
As a side note, the ruffle fabric costs more than regular cotton quilting fabric per yard. But, it is a lot wider, and it’s amazing how far one yard goes.
Now I layered all the pieces.
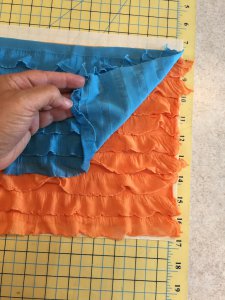
For some reason, the blue piece was slightly wider than the orange. So, I just trimmed them all to be even.
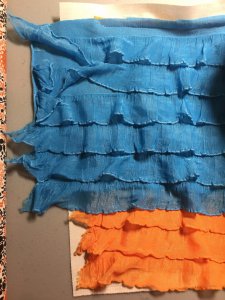
Can you see how the top of the muslin sticks out above the ruffle pieces? This is how it’s supposed to be. Layer your fabrics as shown with the top of the muslin sticking out slightly.
You can see that the bottom of the muslin retains the selvedge. The ruffle fabric needs no hemming.
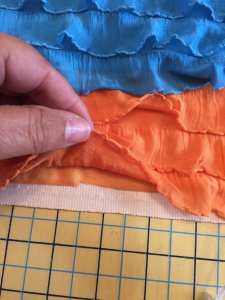
Now you can pin and then hand or machine baste the top of the ruffles to the muslin.
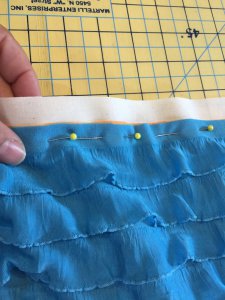
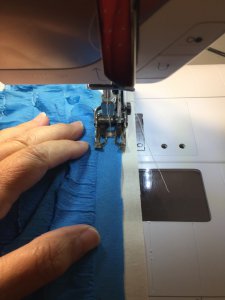
You can kill two birds with one stone here. Increase your stitch length so that you can use this as a gathering stitch. You’re going to need to do that gathering thing–later.
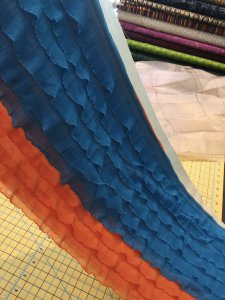
This is what you now have, a long rectangle of 2 ruffle layers on top of the muslin.
Make sure that your ruffles are all going in the same direction–downward–so that they’re not flipped up and don’t flip up when you sew them. So once again, as shown in the photo below, you need to baste the ruffles down.
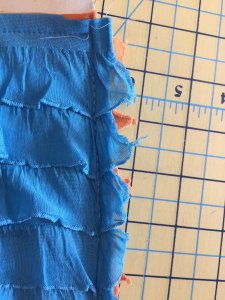
I have a serger. But, if you don’t, don’t worry. You can always trim and zig zag after you sew. You will now sew that back seam with a serger or sewing machine. Right sides together!
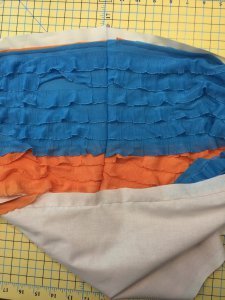
Cut your waistband. I chose coordinating fabric that has orange and blue in it. It’s a cotton quilting fabric, so it’s 44 inches wide. Cut a width of this x 3 inches.
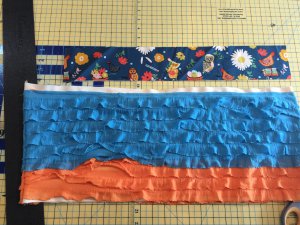
The waist band is a long rectangle. There are 2 long ends and 2 short ends. With right sides together, sew the short ends together leaving a 1 inch opening for the elastic. Then, fold the long rectangle wrong sides together.
Gather the skirt so that it is the same length as the folded waistband.
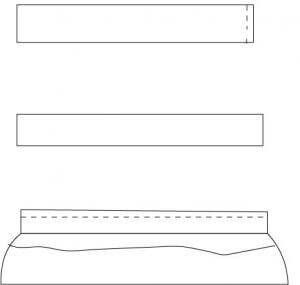
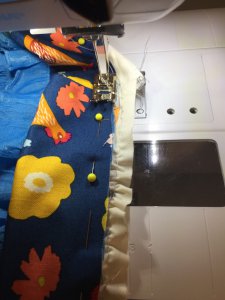
Stitch the waistband to the skirt, aligning the top of the ruffle with the raw edge of the waistband, right sides together, raw edges even.
Trim the excess muslin. Finish the edge with a zig zag stitch or serger.
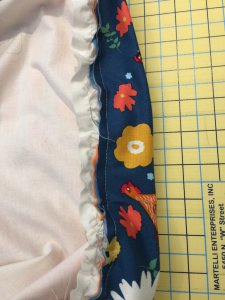
Cut a piece of 1 inch elastic to the waist measurement of skirt recipient. Thread the elastic through the opening in waistband casing. Stitch the elastic together and sew the opening closed.
