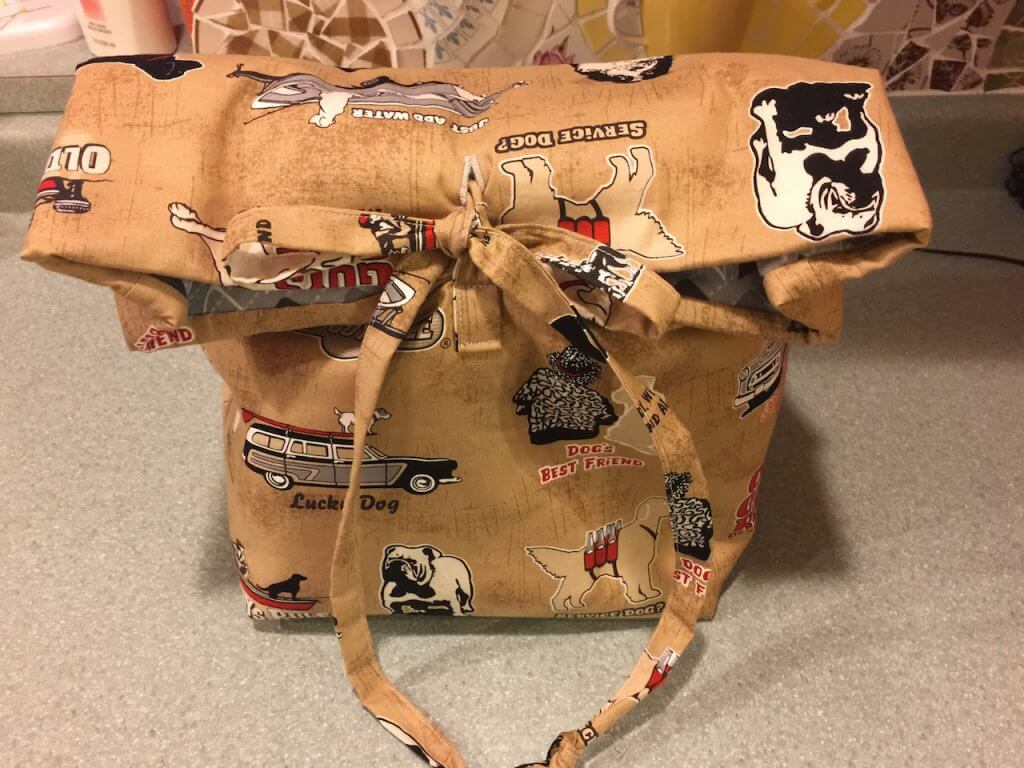
So, I was getting a little bit tired of seeing all these wine bags. There are patterns for them everywhere. There are ideas for them everywhere. I don’t drink wine. I like a cocktail or a beer. Not wine. I know other people that are like me, and they don’t drink wine either. I want to buy someone a six pack of beer for Christmas, or for their birthday, or just as a hostess gift. So, why is there not a bag for beer gifts?
I took matters into my own hands. Here’s my rendition of what a beer bag may look like.
So here’s how it’s done.
Materials:
2 rectangles 16″ x 19″ main fabric
2 rectangles 16″ x 19″ lining fabric
1 strip main fabric 2 1/2″ x WOF (42 inches)
2 rectangles 16″ x 19″ insul-brite thermal fabric
Baste the 2 rectangles of the insul-brite to the lining fabric rectangles.
Lay the 2 rectangles of main fabric right sides together. Stitch two of the 19 inch edges together using a 1/4 inch seam, and one of the 16 inch sides. If you are using a one way print, make sure that you are stitching the “bottom” of the 16 inch rectangle.
Repeat with the lining fabric
Bring the side seam on the 19 inch side together with the bottom seam of the 16 inch side that was sewn, creating a blunted corner.
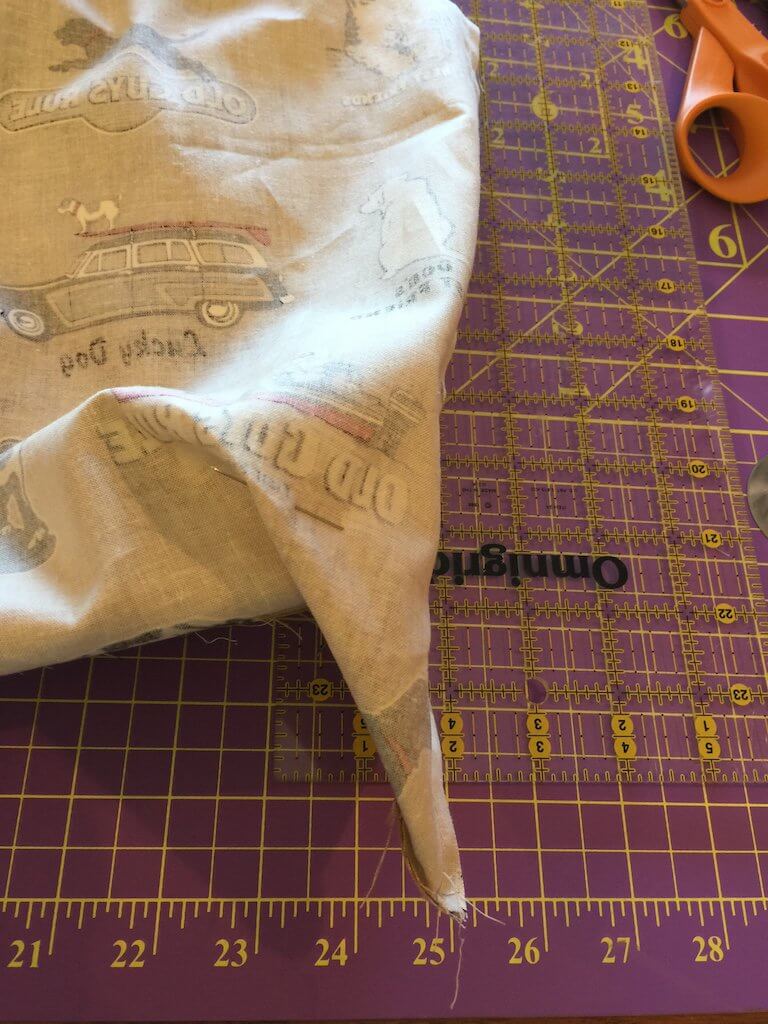
Pin across the fabric as shown, so that the bottom corner looks like the picture shown.
The area with the pins must extend 5 1/2″ across.
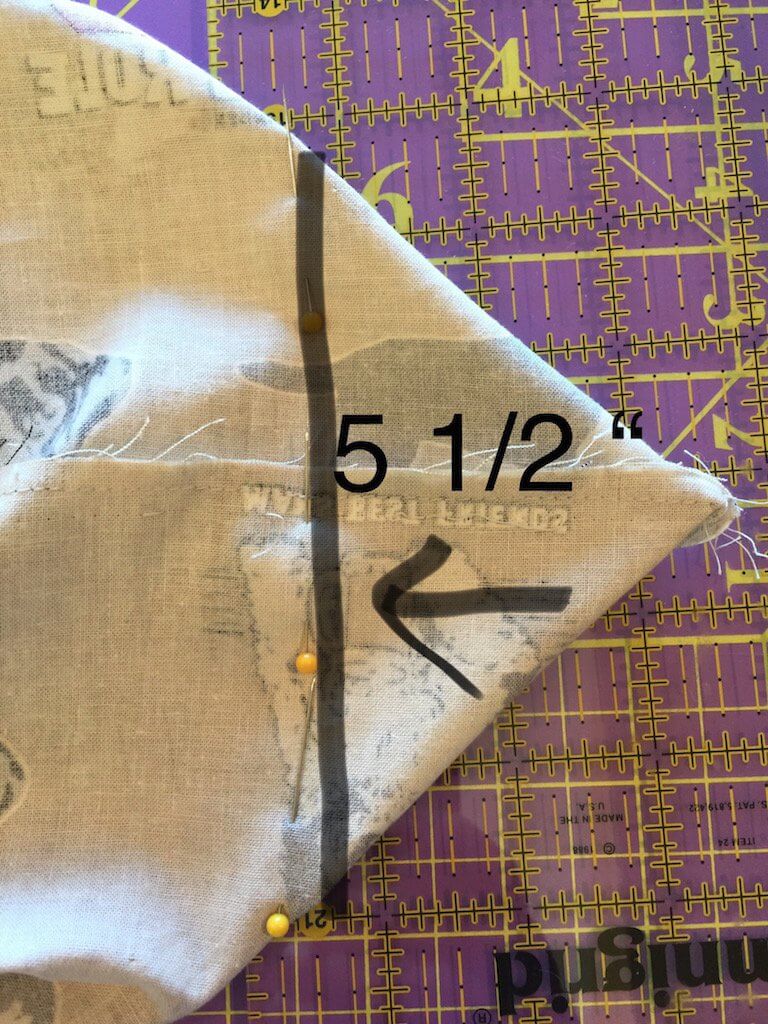
The distance from the 5 1/2″ line and the corner should be 3 inches down.
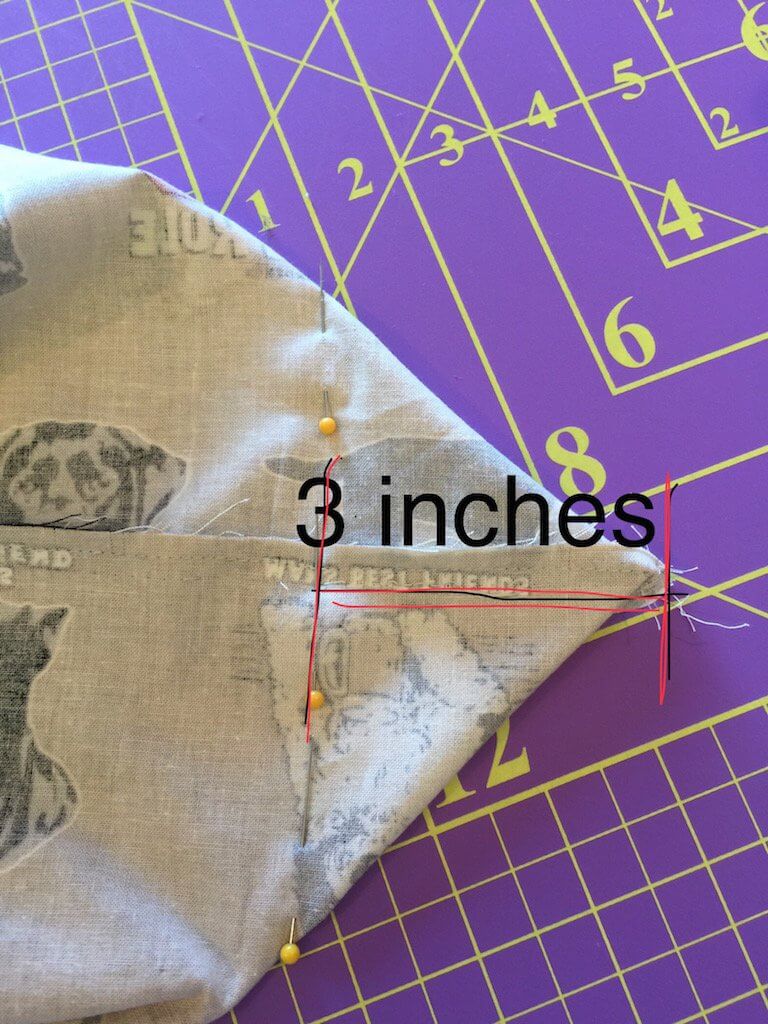
This blunts the corner and creates a squared off bottom.
Stitch across the area that is pinned for the full 5 1/2 inches, from one end to the opposite end. Cut off the corner.
Repeat for the lining with the insulbrite.
With right sides together, slip the lining into the main fabric bag. Stitch around the top, leaving and opening to turn.
Turn right sides out, press and stitch the opening closed.
Fold the long edges of the 2 1/2 inch strip in toward the center of the strip until they meet. Press. Fold in half along the long axis. Stitch the open edges together to create a long closed strip.
Cut the strip in half.
Make a buttonhole about 1 1/2″ from the top of one side of the bag.
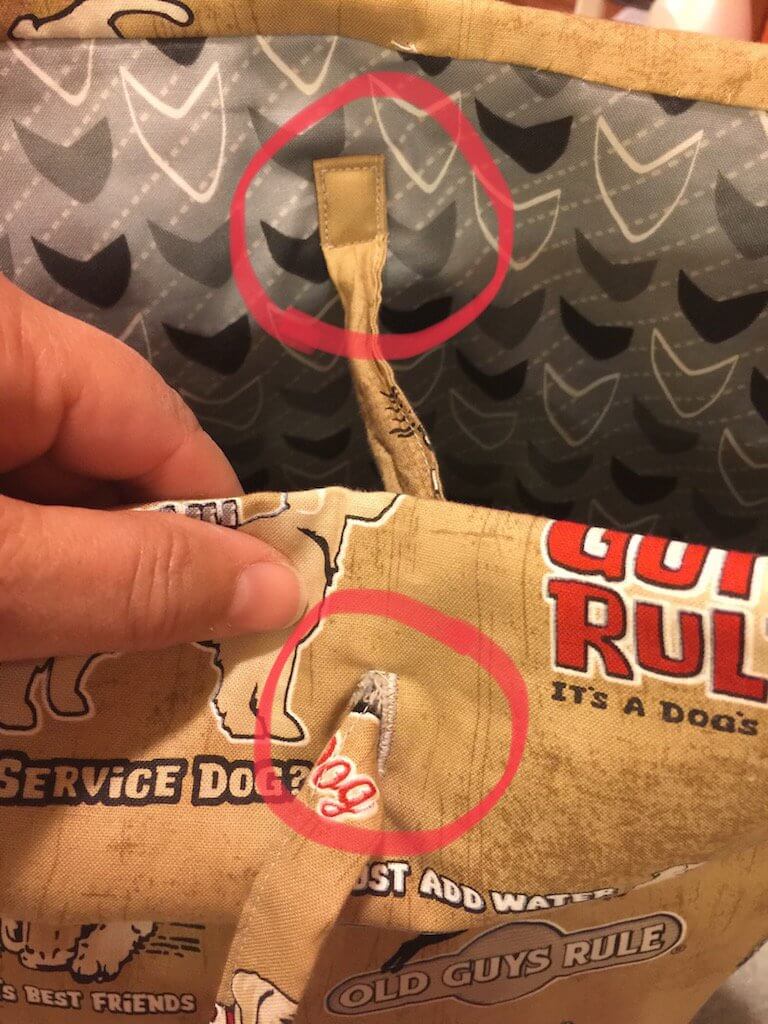
This is where the buttonhole should be placed.
Stitch one of the 2 ties that were made in the previous step just opposite the buttonhole on the inside of the bag, lining side.
Stitch the other tie to the opposite side of the bag, on the outside, to the main fabric, 8 inches down from the top and in the center.
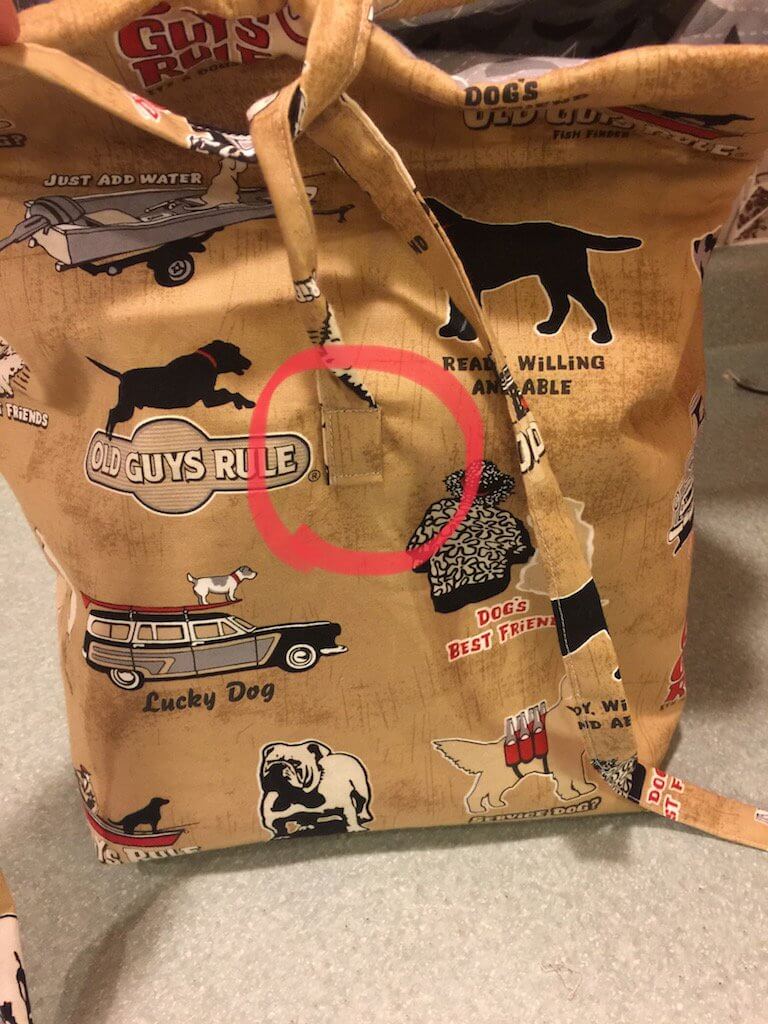
Tie the two ties together to hold the bag closed. Add your frosties and go!
