Instructions for Clutch Roller Shades
Congratulations! You’ve just made the smartest purchase in window coverings for your living or working space.
The sky is the absolute limit to the design possibilities for these shades.
In your shade kit you will find:
1 60 inch heavy duty cardboard tube
1 box of roller shade components
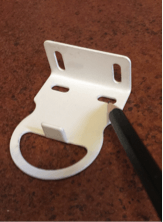
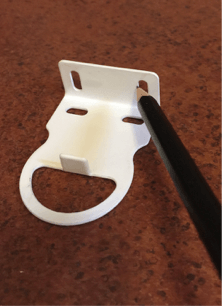
- Clutch ends for tube. One with a peg and the other with the stainless steel chain and clutch unit.
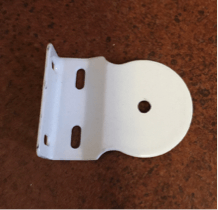
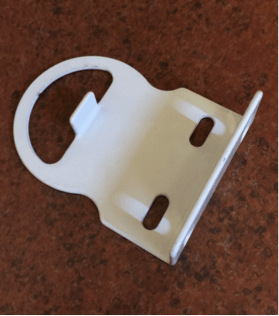
- Brackets for mounting to window or wall
- Plastic wall anchors
- Screws
- Elliptical shaped bar for bottom of shade
You may choose to mount the brackets inside the window frame or outside. There are openings on the brackets for either type of assembly.
Decide which side of the window you want the stainless chain to be on. You will be putting the bracket with the tab on that side.
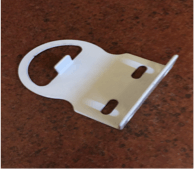
The other bracket with the circular opening will go on the opposite side.
To Do an Inside Mount:
If you wish to mount the brackets to the inside of the window frame you will use these openings in the brackets:
Mark the openings with a pencil onto the wood while holding the bracket in the correct place on inside of the window frame.
Put the brackets aside and drill small pilot holes in the window frame.
Picking the bracket back up, hold it in place and screw the screws into the holes.
To Do an Outside Mount:
Follow the directions above but use these holes in the brackets:
Once you have the brackets mounted you will be ready to measure and cut your length of cardboard tube.
This is a two-person job. You will need assistance to hold the clutch roller ends into the brackets. You will need to place the ends into the brackets to make sure that you cut your tube to the correct length. If you don’t have help, then tape them into the openings in the brackets, making sure that they are firmly in place.
The bracket with the tab in it will be attached to the clutch piece that houses the stainless steel chain.
The bracket with the tiny circular opening will be attached to the small end that has the peg in it.

After the brackets are mounted, you will need to simultaneously hold the clutch end and the opposite unit into the brackets. That is when you will take your measurement. You will need to measure the distance between these points on the units:

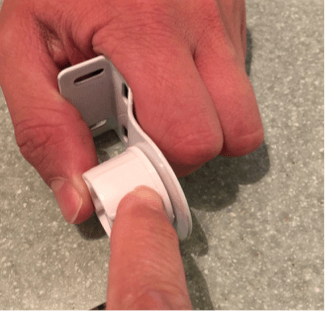
The cardboard tube has been inserted in this photo to show exactly where it sits on the clutch system. This enables you to see exactly why you need to measure from those two sites.
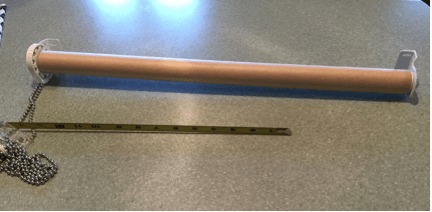
Mark your cardboard tube to that exact length and cut it. Make sure that when cutting and taking apart you have a clean through and through cut so that you don’t damage the inner lumen of the tube. The size of the inner lumen is calibrated exactly so that the clutch roller system will fit perfectly.
****If you accidently strip the inside of the cardboard tube, it works wonderfully to insert a small piece of double sided foam tape into the inner lumen to keep the shade from slipping when pulled. *******
Attach the clutch roller ends into the cardboard tube. To place the entire unit into the brackets will take some slight bending of the bracket with the small circular hole.
First insert the end with the stainless steel chain onto the bracket. Then, apply slight pressure, bending the bracket slightly outward to allow the opposite end with the peg to pop into the hole.
Once the entire roller is inserted, you will make a straight line on the cardboard tube, using a level and a marker or pen. This is where you will glue or tape the shade.
Making the Shade
What you will need:
Fabric for Shade
Fusible lining fabric
Hot glue
The shade will be as wide as the cardboard tube. It will be as long as the window, plus any overhang you would like, plus 8 inches.
The extra 8 inches is the amount that you need for a nice roll at the top of the shade.
Once you know the length and width, cut the fabric to that size, making sure that all the edges are straight and square.
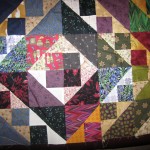
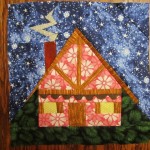
So many variations are possible. You can add trim to the bottom of the shade. You can place something decorative in the center and border it out, and then cut to the length and width that the shade should be. Go to www.bungalowquilting.com to see some of the examples of the shades that I have made. This is only a tiny example of all the fun you can have!
Lining:
Cut the lining to the exact same dimension as your shade. Iron it to the wrong side of the shade.
To finish the long edges, you can either use a serger or a straight stitch about 1/8 inch away from the edge in a matching thread color or a decorative stitch.
You can also apply extra adhesive to the edges such as a stitch witchery tape that is heat sensitive. You can then leave it without any sewn finish. However, you should make sure that your adhesive is going to prevent fraying of the edges of your fabric.
On the end of the shade, you will need to sew a casing for the elliptical plastic insert.
Fold fabric edge to the wrong side of fabric about 1 ¼ inch and sew along the edge.
Mark the plastic elliptical at the correct measurement and score with a knife or utility blade. It should snap to the correct length after being scored. Insert it into the casing at the bottom of the shade.
Place a fine line of got glue just under the line that was drawn on the cardboard tube. Line up the edge of the shade with the line so that it is hanging straight and glue it into place. Roll the fabric onto the cardboard tube using the clutch roller system.