I’ve always wanted to make a Union Jack quilt. Don’t ask me why. I am not an Anglophile, but there is something so pleasing to the eye about that design. So, get your British on, and read all about how to make this quilt. This is a free pattern so enjoy!
Materials:
Quilt measures 88” x 97” Finished Block size 11” x 12”
All seam allowances are 1/4” unless otherwise noted.
- 30 assorted print squares 10 1/2” x 10 1/2”
- 4 yards background fabric for sashing, strips and border
- 1/8 yard each of 6-7 prints for center stripes
- 5 yards backing fabric
- 3/4 yard fabric for binding
Cut:
Background Fabric:
- 30 strips 1 1/2” x 16 1/2”
- 30 strips 1 1/2” x 17 1/2”
- 30 strips 1 1/2” x 13”
- 60 strips 1” x 13 1/2”
- 24 strips 3 1/2” x 11 1/2”
- 5 strips 3 1/2” x 72 1/2”
Center Print Strips:
30 strips 1 1/2” x 13 1/2”
Note: the borders will be cut later. Instructions will be provided for how to prevent wavy borders.
Make the Blocks:
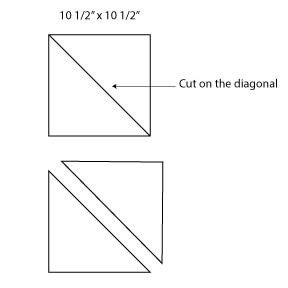
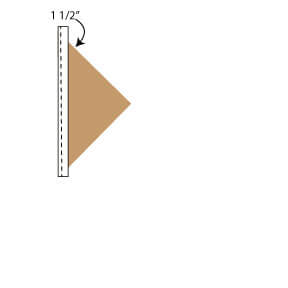
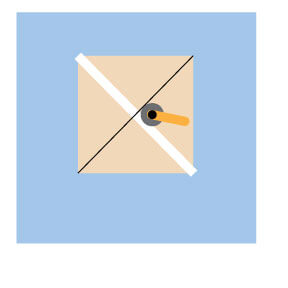
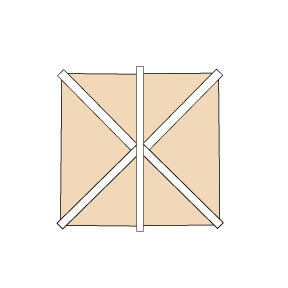
- Using a rotary cutter and ruler, cut a 10 1/2” block in half along the diagonal.
2. Place a strip that is 1 1/2” x 16 1/2” along the long edge of the triangle, right sides together, matching edges and stitch.
3. Fold the strip out and press the seam allowance toward the strip.
4. Place the other triangle right sides together with the strip so that the triangle is laying centered over the first triangle, and looks like this.
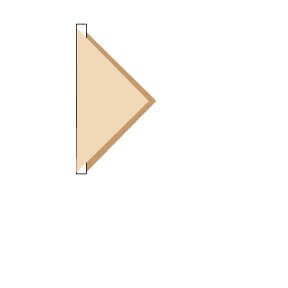
5. Stitch 1/4” along the edge, aligning the edge of the triangle with the strip and keeping it positioned as shown above.
6. Open the second triangle outward and press the seam allowance toward the strip.
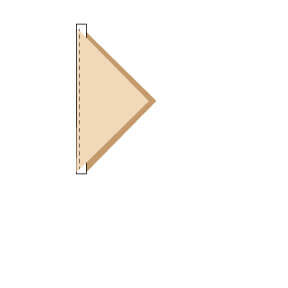
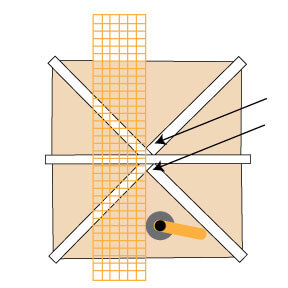
7. Using a rotary cutter and ruler, cut the above unit in half along the diagonal, perpendicular to the white strip as shown.
8. Follow steps 2-6 with the second cut made, add another 1 1/2” strip, and centering the triangle so that the first strips are directly across from each other and the unit looks as follows.
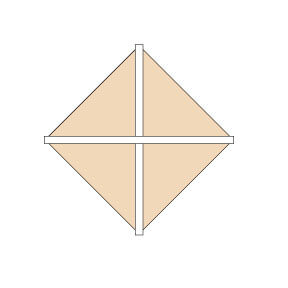
9. Make another cut using a rotary cutter and ruler, and laying the ruler so that it is squared with the block top and it runs through the center of the “x” created in the middle of the block.
10. Add another 1 1/2” strip to the newly made cut edge of one half of the unit, and stitch along the edge using a 1/4” seam allowance.
11. Press the seam allowance toward the strip.
12. Add the second half of the block to the strip sewn in step 10. To make sure that the strips line up across the block, make 2 marks with a marking pencil on the center strip sewn in step 10 as follows.
13. Stitch the two sides together aligning the edge of the strip to the half block and matching the markings to the edges of the strips in the side without the strip.
14. The block should look like this.
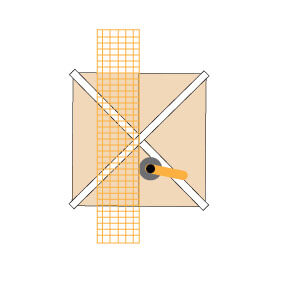
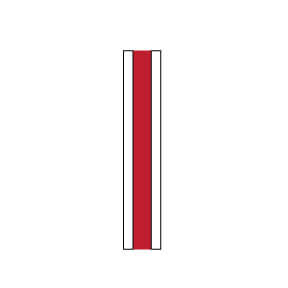
15. Stitch a 1” x 13” background strip to each side of a 1 1/2” x 13” print strip along the long edges. Press the seam allowances toward the center.
16. Using a rotary cutter and ruler, cut the Union Jack block in half, making certain to line the ruler up along the edge of the block so that it is straight, and lining the ruler up with the intersecting points as shown.
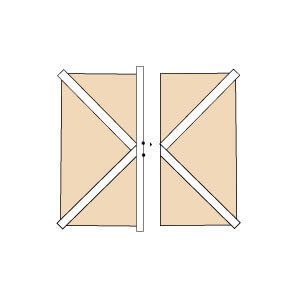
17. Stitch the print stripe unit from step 15 to each half of the block along the long edges. Press the seam allowances toward the center.
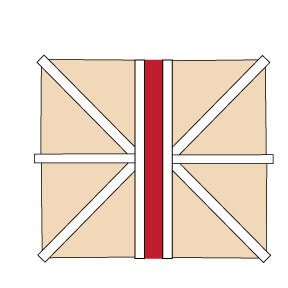
18. Square the block so that it measures 11 1/2” x 12 1/2”.
19. Follow steps 1-18 to make 30 Union Jack blocks.
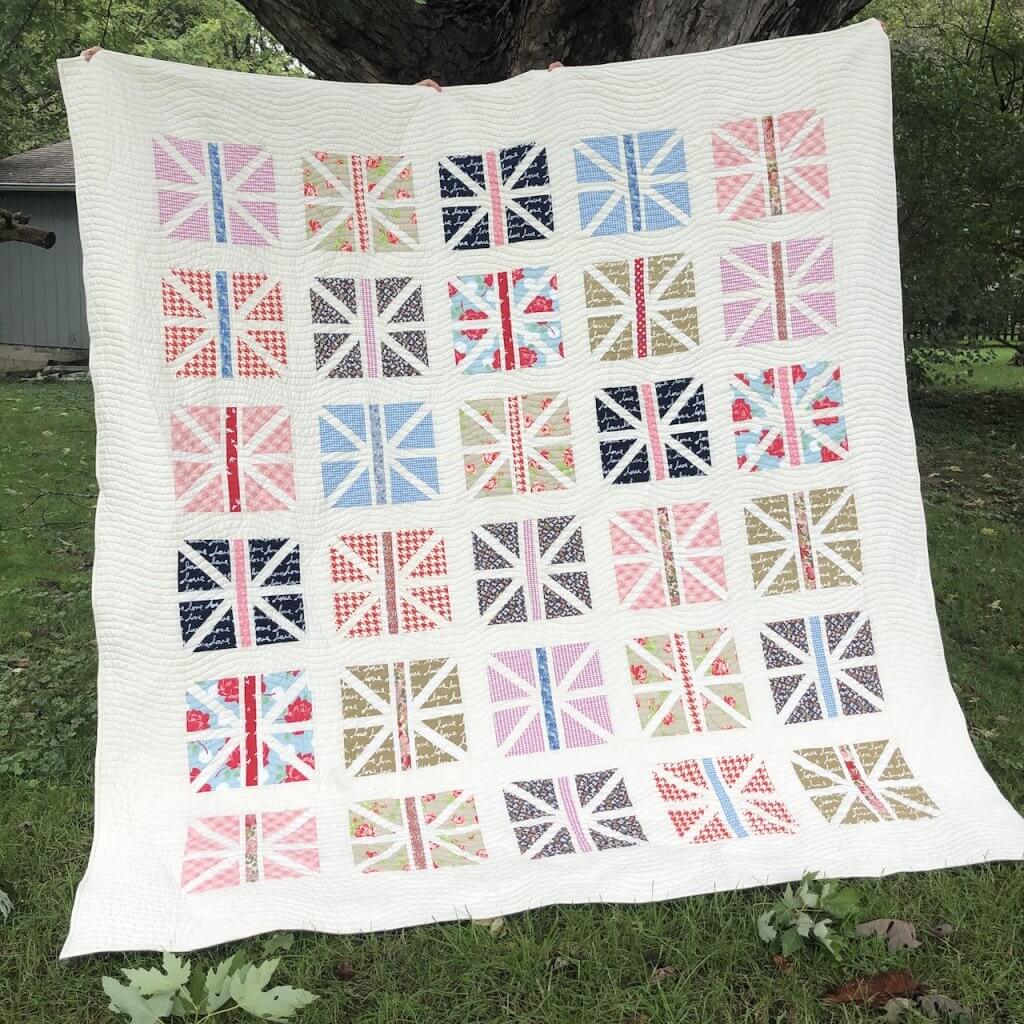
20. Stitch the sashing strips between the blocks using the photo of the quilt as reference.
21. Stitch the long sashing strips (3 1/2” x 72 1/2”) between the rows.
Making the Borders
Making borders deserves a special paragraph. There’s nothing worse than seeing a quilt with wavy borders. When a quilt is measured for the border there must be special care taken. One must never ever measure along the edge of the quilt. Also, one must never just cut a strip that is longer than the edge of the quilt and just sew it on.
Here’s how to do it.
- Measure your quilt through the center either for the length or the width. It doesn’t matter which one you do first.
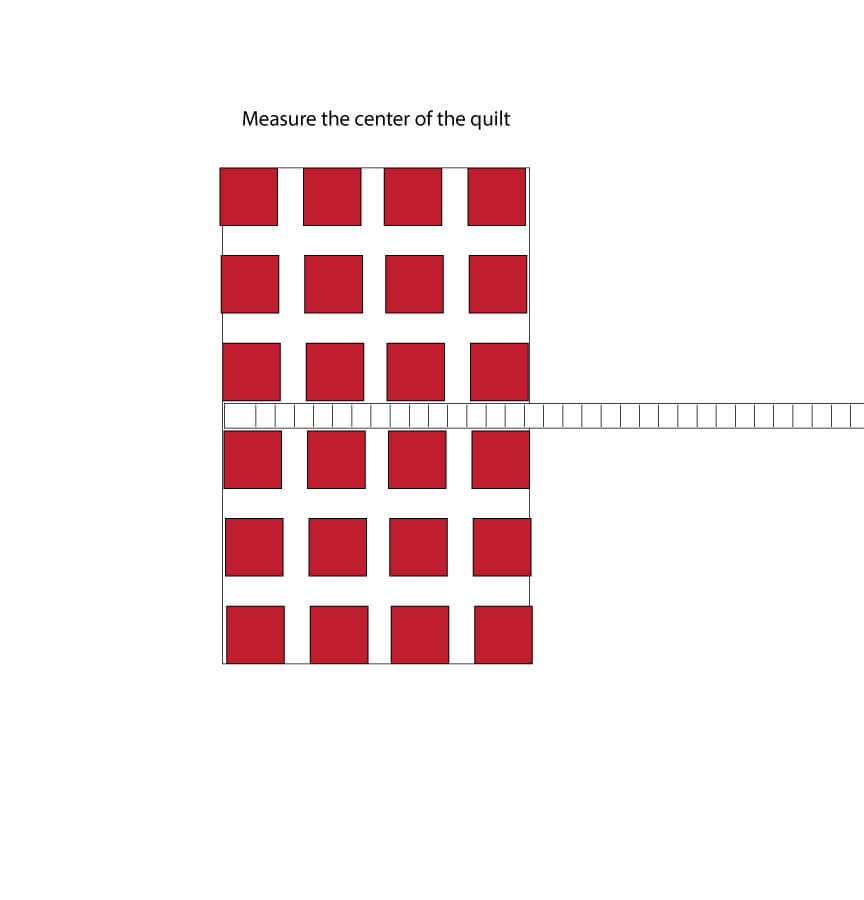
2. Decide how wide you want the border to be, and then cut it the length that was measured across the center of the quilt. Do this twice, and stitch it to both edges of the quilt. You must make the quilt fit the border. This is important. If the quilt edge is longer than the border that was cut, the quilt will be placed against the feed dogs as it is sewn. Pin carefully all the way down the length of the border.
3. If the quilt is significantly different than the border, you may need to do some “easing” as they say in the garment sewing world. You may need to make a long row of stitching along the edge of the quilt. Increase your stitch length and sew down the edge of the quilt, inside the 1/4” seam allowance, meaning, about 1/8” from the edge. Sometimes this is all that is needed to stabilize and pull the edge into shape. Otherwise you can actually pull the threads sewn and gather it slightly.
4. Measure down the center of the quilt again, along the length of the quilt and include the two borders. This is the measurement for the side borders. Cut the borders to the measurement and follow steps 2 and 3. Press the seam allowances toward the border.
Finish
- Layer, quilt and bind in your favorite manner.